Teknetics Eurotek Pro Review
2014
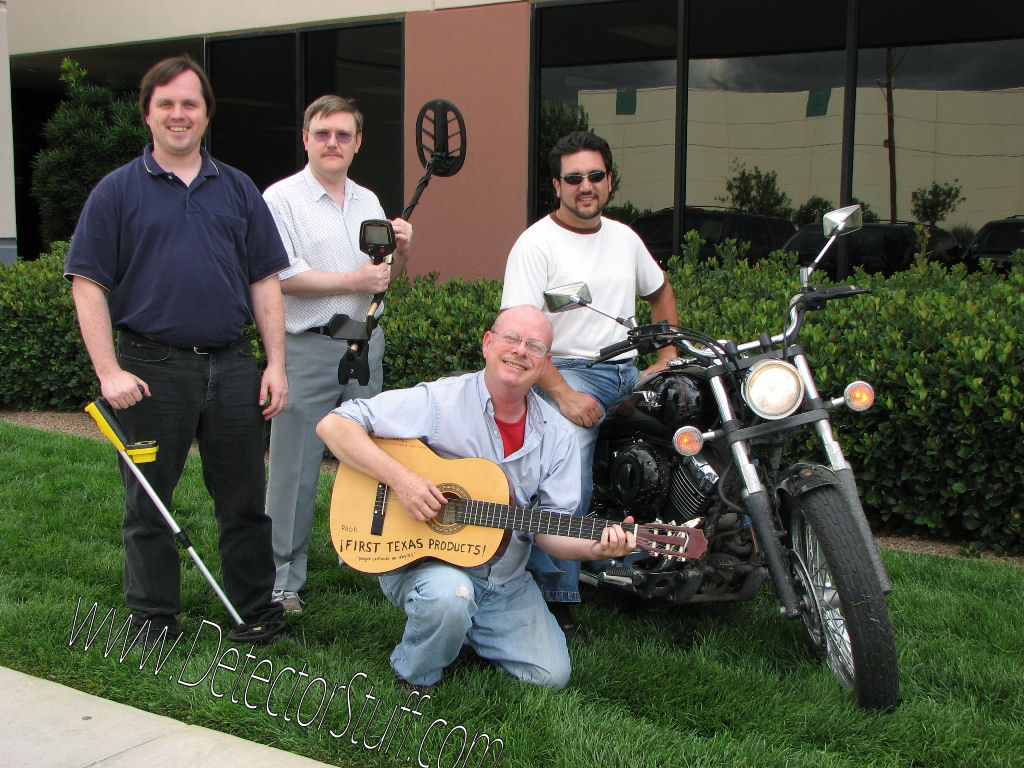
Mark Ellington
www.detectorstuff.com
Intro –
 You know, the Eurotek Pro kind of frustrates me! No, no…not because it has any problems . …but, instead , because it performs so blasted well while being so inexpensive ! I mean, I have quite a few much higher priced detectors that can’t do what this little fella does. Sure, it doesn’t have a lot of the features found on high-enders like backlight, notches, etc. But what it does bring to the table is the best performance I’ve found in ferreting out non-ferrous targets that are surrounded by iron.
When you think about old coins and relics, are most existing lost goodies still undiscovered because they are beyond the depth range of modern metal detectors? or, instead, is it because they are “masked” by iron? I would venture to say most are hidden by old iron.
When you look for signs of human activity of decades and centuries past, you know the ground will be FULL of iron bits, particles and pieces. The thicker, the better as far as an active site goes…but the worse for detecting because iron effectively hides the good stuff if you use your metal detectors discrimination.
Recent detectors from Teknetics seem to be focused on enhancing the ability to sniff the good stuff out of the junk. The Eurotek Pro seems to have taken that concept and made it the primary function and purpose…and it works! The fast processor speeds of the Eurotek helps it “peek” between iron to notify the hunter that something good is lurking in the dirt.
Background and physical design –
The Eurotek Pro is the most recent release from FTP owned Teknetics. The primary Engineer on the Eurotek project was Jorge Saad (Tek Omega, Delta and Fisher F5 fame). There were also major contributions by several other First Texas Engineers including the legendary Dave Johnson. The primary Engineer on the mechanical package was John Griffin.
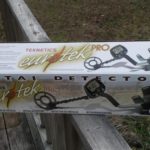
The Eurotek comes in a smaller box than I’m accustomed to… and requires slightly more assembly that other metal detectors I’ve received. Luckily, assembly is a very simple affair that only requires a phillips head screwdriver. 2 screws for the display housing and 2 for the arm cup.
The ETP was field tested worldwide during the engineering phase to sample a variety of soils and conditions.
There seems to be 3 primary Eurotek packages: First is the Eurotek Pro with 11” DD coil, next is the Eurotek Pro with the 8” concentric coil. There is also the Eurotek version that has a different coil connection design and slightly different features. The unit I tested with the Eurotek Pro with stock 8” coil.
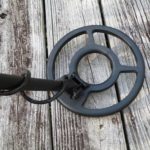
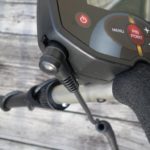
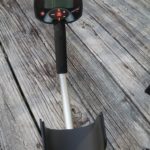
The Eurotek Pro uses the same S-rod design seen on several other Tek detectors but the control housing is new. One thing I really like is how deep the housing is recessed onto the rod, giving you excellent thumb access to the controls and pinpoint button. The lower center of gravity also gives me the impression of stability during normal coil swings…less wrist fatigue over the duration of a hunt. Believe me…weight will not be a problem! The Eurotek is a true feather-weight scrapper!
Another great thing about the Teknetics line is that most of their coils are interchangeable, with the only real exception being the T2. In other words, if you have an Omega, Gamma, Delta, G2 etc. you can swap coils around with the Eurotek Pro. I tested my Eurotek Pro with the 8 inch concentric, 10 inch elliptical and 11 inch DD. They all worked GREAT on the ETP! I don’t have the 5 inch hockey puck coil or the new 10 inch DD closed coil but I see no reason they won’t kick some serious butt as well.
Observations, functions and hunting! –
The Eurotek line is truly an international design. One common foe facing detectorists world-wide is iron infested sites. Areas in Europe that have seen human activity for millennia can make our U.S. sites seem clean by comparison. The Eurotek was designed to let the hunter wade into these type sites and pick out the good stuff. Why? Well, more iron means more people. More people equals for opportunities for dropped coins, jewelry and relics!
When I first started hunting with the ETP and heard the VCO middle range audio, I was somewhat baffled! The iron audio is a low “grunt” and the high conductor audio is a nice audible high tone…nestled in the middle, however, is a variable tone known as “VCO” (Voltage Controlled Oscillator) VCO audio means the pitch changes depending on the strength of the signal…so if it’s something like a gold coin that is shallow (like 1 or 2 inches) the audio will be a high pitched squeal. If the target is deeper though, it will be a lower pitch. To me, this is a great feedback feature of the ETP…and a feature I’ve never seen combined with low and high tones on any other metal detector, regardless of price. Essentially, this range is your jewelry and gold alert!
(Interesting side-note… First Texas Products President and CEO Tom Walsh came up with the VCO tone idea for the ETP)
The Eurotek is powered by a single 9-volt battery that will give you many hours of hunting time.
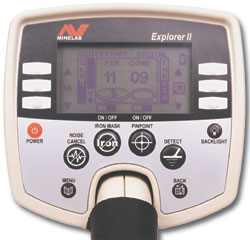
Looking at the controls, they are, well, simple!

On/off
Menu
Pinpoint
Up/down adjust
The menu items are: Sensitivity, Volume and Discrimination. As ordinary as these sound, they are actually doing some unusual stuff!…
1. Sensitivity – This one is pretty straight forward. Default is 7. I usually run as “hot” as the site will allow. With the stock 10” coil, running 10 was no problem, even near electric cattle fences. With the 11” DD, I usually run around 9.
2. Discrimination – Okay, here’s where things begin to be different. Basically, everything that ID’s 1 – 69 can be eliminated by DISC. 70 and beyond can’t be eliminated, but DISC will change the tones…confused yet? 🙂 See the chart from the manual below:

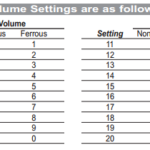
3. Volume – Hey! Volume is simple! How loud do you want it…right? Well, sorta. Here’s how volume works on the ETP. The available range is 0 – 20. 0 (zero) cuts out all sound except for the overload signal. All display functions are still normal… 1 – 10 is the volume level for non-ferrous targets.
11 – 20 is the volume level for ferrous targets (iron). If you are hunting sites that are loaded with iron, you can adjust the iron volume by itself to keep it from being too bothersome. I personally like to hear iron so I know when to slow down and probe the site carefully…this makes the iron volume feature awesome! hear it, but it doesn’t have to aggravate you.
The ETP has a “fixed” ground balance that somehow handles ground changes just fine in my neck of the woods. When playground hunting, I usually have to ground balance when moving from chip bark to soil…if not, my detectors will usually start “falsing” (giving incorrect signals). The ETP will work fine in these transitions…even with the sensitivity maxed out.
Another difference most will notice is that there are no little ID icons on the display that guess what my target is. I thought this was a bad thing until I started thinking about all the “dimes” or “quarters” I’ve dug by icon on other detectors that actually end up being junk like screw caps or even rusty bottle caps. I also realized that I was “learning” the ID numbers and ranges rather quickly for coins…and I also spent more time investigating a “high tone” when coin hunting since there was no icon making a guess for me…this is a good thing. Solid locks (varying on a few numbers during coil sweeps) were almost always round objects like coins or rings. Bouncing ID’s were usually odd shaped objects.
One “icon” you will notice is the Iron ID feature. It will flash in the upper left corner when the coil passes over iron…this is extremely handy when analyzing a spot where you hear a “good” signal in the midst of the iron. It will help you recognize if you are hearing something normally hidden and also just how close the iron is to the object.
Some of this makes you wonder how many times a really deep coin didn’t quite hit in the right range to light up the coin icon…and was unknowingly left undug .
As previously mentioned, the Eurotek is an international metal detector…icons for American coins will mean very little to coinage from other parts of the world. (be aware though…users who prefer “Inches” during pinpoint can change from the default CM by doing the following:
Change Pinpoint from Metric to Imperial
Detector OFF
press and hold PINPOINT
Turn the detector on (while still holding pinpoint)
Release then press and hold pinpoint to toggle between CM and IN (centimeters and inches)
It will keep this setting even after powering off and on.
Save your favorite settings!
After you have the ET set to your preferences, press and hold the MENU button for 8 seconds. The settings will be saved!
In closing –
There’s no doubt in my mind that many will overlook the Eurotek simply because it’s so inexpensive. Well, for those of us using the Eurotek, their loss is our gain! I am sniffing the good stuff out of iron infested sites that the more expensive detectors are leaving in the ground. I have quickly become a fan of this machine…simple, inexpensive and highly effective.
Points:
1. The Eurotek Pro, at only $219 MSRP may be the one of the fastest ROI (return on investment) detectors ever built! The thing is a coin, jewelry and relic bloodhound.
2. The ETP, when compared to other detectors in the price range, offers superior performance and features.
3. I like to fiddle with controls, menus, knobs and settings as much as the next guy! (maybe even more) However, sometimes, I just want to hunt!
4. Have you ever been metal detecting a site and wondered if you have something set wrong that’s keeping you from reaching the full potential of your machine? Concerned you’ll put your coil over that rare, elusive coin…but you won’t hear it because you goofed up a setting? If so, the Eurotek Pro should give you peace of mind and a sense of relief. It’s almost impossible to make it “not” work!
Have you discovered tips or tricks while using the Eurotek Pro? Be sure to scroll to the bottom and leave them in the comments section!
Useful resources:
Detectorstuff Teknetics Forum (not much here yet…help me get some conversations going!)
*Edit* 1/15/14 update: Following up on a few questions folks have emailed me about the Eurotek.
- Not quite as deep as the Omega in my soil (Central North Carolina)
- Very, very “quiet” machine. Not bothered by my usual suspects noise makers…electric cattle fences, overhead power lines
Informative videos by Mark Gilespie
Common ID’s from the Eurotek Manual:
Target-ID Coin Reference. Below are known Target-IDs for some reference coins:
Merovingian Triens (gold, France) 42
Polish Zloty (Pre-WWII) 0.20 zl (1923 nickel) 44-99
Celtic Potin (copper+lead) 52
Polish Zloty 0.50PLN 54-56
USSR 50 kopeek, 1980, Nickel, D 24 mm. 56
Russian Scale Peter I, 1705, Silver, 0.25 gr. 56-57
Polish Zloty 1PLN 56-57
US Nickel 56-57
Polish Zloty PRL 100zl (CuNi) 58-59
Bulgarian 1 stotinkas, 1999 (CuAlNi) 58-64
Bulgarian 10 stotinkas, 1999 59-60
Bulgarian 50 stotinkas, 1999,2004,2005,2007 59-65
Roman Nummus (bronze) 60
1/4 of Stater (gold, France) 60
50cent Chambre du Commerce (France) 60
Bulgarian 2 stotinkas, 1999 (CuAlNi) 60-64
Polish Zloty 5PLN 61
2 Euro Coin 62-66
Polish Zloty ‘0.05PLN 63-64
British 20p 64-65
Polish Zloty 2PLN 64-65
USSR, 5 kopeek, 1961, Bronze, D 25 mm. 65
Russian Scale Mikhail Fedorovich, 1613-1645, Silver, 0.625 gr. 65
Bulgarian 5 stotinkas (old) (CuAlNi) 68-73
Bulgarian 1 lev 69-73
10 Euro Cent 70-74
1 Euro Coin 70-78
Medieval double sol coin (France) 75
20 Euro Cent 76-78
50 Euro Cent 76-80
Double Tournois (copper, France) 78
British £1 79-80
Polish Zloty PRL .20 zl (aluminum) 80
10 ct Napoleon III (bronze, France) 80
British £2 81
2 Franc Morlon (Aluminum, France) 82
US Dime 84-85
Polish Zloty (Pre-WWII) 2zl (1933 silver) 86-87
US Quarter 88-90
Russian, 50 kopeek Nikolay II,1896, Silver, D 27 mm. 93-94
US Silver Dollar 94-95
Russian, 2 kopeek, Alexander I, 1816, Copper, D 30 mm. 94-95
Russian, 1 ruble Nikolay II,1896, Silver, D 34 mm. 98
Russian, 5 kopeek, Ekaterina II, 1781, Copper, D 41 mm. 99